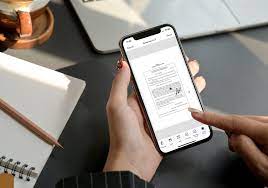
Are you tired of dealing with stacks of paper and the hassle of printing, signing, and scanning documents? Look no further! With your iPhone, you can embrace the world of paperless efficiency and sign documents with ease.
In this article, we will guide you through the process of signing documents on your iPhone, making your life more convenient and saving you time and effort.
By utilizing the built-in document signing features on your iPhone, you can seamlessly add your digital signature to any document in just a few simple steps. We will show you how to set up your digital signature and provide a step-by-step guide to signing documents. Plus, we will share tips on ensuring the validity and security of your digital signature.
But why stop there? We will also explore how integrating document signing apps can enhance your efficiency even further. So, get ready to embrace the power of technology and say goodbye to the hassle of paper documents.
Let’s dive in and discover the world of paperless efficiency with your iPhone!
Key Takeaways
- Digital signatures on iPhone save time, money, and office space.
- Built-in document signing features on iPhone make it easy to add digital signatures.
- Steps to set up a digital signature on iPhone: open document, tap Markup icon, select Signature, create/use existing signature, tap Done.
- Integrating document signing apps enhances efficiency and productivity.
Understanding the Benefits of Digital Signatures
You’ll be amazed at the time and money you’ll save by embracing the efficiency of digital signatures on your iPhone. With the ability to sign documents digitally, you no longer need to print, sign, and scan or mail paper documents. This eliminates the need for physical storage, saving you valuable office space.
Additionally, digital signatures ensure faster turnaround times as you can sign documents instantly, regardless of your location. Time-consuming processes like printing, signing, and mailing are replaced by a simple tap on your iPhone screen.
Moreover, digital signatures provide enhanced security, as they’re encrypted and tamper-proof, giving you peace of mind knowing that your signature is valid and authentic. Say goodbye to the hassle of paperwork and welcome the convenience of signing documents digitally on your iPhone.
Exploring the Built-in Document Signing Features on iPhone
Discover the amazing features on your iPhone that allow you to effortlessly put your digital signature on important papers. With the built-in document signing features, you can embrace the paperless efficiency and save time and effort.
Whether you need to sign a contract, a permission slip, or any other document, your iPhone has got you covered. Simply open the document you want to sign, tap on the Markup icon, and select the Signature option. You can then choose to sign using your finger or Apple Pencil. The iPhone will capture your signature and allow you to resize and reposition it on the document.
Once you’re satisfied with the placement, just tap Done, and your digital signature will be securely added to the document. It’s quick, convenient, and ensures that your documents are legally binding.
Say goodbye to printing, scanning, and mailing paper documents – your iPhone makes it all so much easier.
Setting Up Your Digital Signature on iPhone
Get ready to streamline your paperwork with the easy setup of your digital signature on your iPhone.
First, open the document you want to sign on your iPhone.
Then, tap on the Markup icon, which looks like a pencil, at the bottom of the screen.
Next, tap on the ‘+’ icon and select ‘Signature’ from the options.
You can choose to create a new signature or use an existing one.
To create a new signature, use your finger to sign on the screen, or you can use the camera to scan your physical signature.
Once done, tap on ‘Done’ and your digital signature will be saved.
Now, whenever you need to sign a document, simply tap on the Markup icon, select ‘Signature’, and choose your saved digital signature.
It’s that easy!
Step-by-Step Guide to Signing Documents on iPhone
To start, it’s crucial to set up your digital signature on your iPhone in order to streamline your paperwork effectively. Once you have your digital signature ready, signing documents on your iPhone is a breeze. Here’s a step-by-step guide to help you out:
- Open the document you need to sign on your iPhone.nn2. Tap on the screen where you need to add your signature.
- A toolbar will appear at the bottom of the screen. Tap on the signature icon.
- Choose the option to create a new signature.nn5. Use your finger or Apple Pencil to sign your name on the screen.
- Once you’re happy with your signature, tap Done.nn7. You can resize and reposition your signature as needed.
- Finally, tap Done to save your signed document.
By following these simple steps, you can easily sign documents on your iPhone, embracing the efficiency of going paperless.
Tips for Ensuring the Validity and Security of Your Digital Signature
Ensure the validity and security of your digital signature by following these helpful tips.
First, make sure to use a secure and trusted app or platform for signing documents on your iPhone. Look for features like encryption and password protection to safeguard your signature.
Secondly, create a strong and unique password for your signing app or platform to prevent unauthorized access. Avoid using common or easily guessable passwords.
Additionally, enable two-factor authentication whenever possible to add an extra layer of security.
It’s also important to regularly update your iPhone’s software to ensure you have the latest security patches.
Lastly, be cautious when sharing your signed documents and only send them through secure channels, such as encrypted email or file-sharing services.
By implementing these measures, you can confidently embrace the convenience of signing documents on your iPhone while keeping your digital signature safe and valid.
Integrating Document Signing Apps for Enhanced Efficiency
When integrating document signing apps, it’s crucial to prioritize seamless workflow and enhanced productivity. By utilizing these apps, you can streamline the process of signing documents on your iPhone, making it faster and more efficient.
Look for apps that offer features like electronic signatures, secure document storage, and the ability to send documents for signature directly from your iPhone. These apps should also allow you to easily view and track the status of signed documents, ensuring that you stay organized and on top of your paperwork.
Additionally, consider apps that integrate with other productivity tools you use, such as cloud storage services or project management platforms, for even greater efficiency. With the right document signing app, you can embrace the paperless revolution and sign documents with ease on your iPhone.
Frequently Asked Questions
Yes, you can sign documents on your iPhone without an internet connection. Simply use the built-in Markup feature in the Files app or download a third-party app like Adobe Acrobat Reader that allows offline signing.
To add multiple signatures to your iPhone for different purposes, go to the Settings app, tap on “Mail,” then “Signature.” From there, you can create and manage multiple signatures to use when signing documents.
Yes, you can sign documents on your iPhone using your finger or stylus. It’s a convenient and efficient way to add your signature to important files. Simply open the document, tap on the signature field, and sign using your finger or stylus.
Yes, you can sign documents in different file formats like PDF, Word, and Excel on your iPhone. Just open the respective app, locate the document, use your finger or stylus to sign, and save it.
When using digital signatures on your iPhone, it’s important to be aware of legal considerations and requirements. Make sure to research and follow the relevant laws and regulations to ensure your digital signatures are legally valid.
Conclusion
So there you have it, you now know how to sign documents on your iPhone and embrace the efficiency of going paperless. With the built-in document signing features and the ability to set up your digital signature, signing documents has never been easier.
By following the step-by-step guide and ensuring the validity and security of your digital signature, you can confidently sign documents on your iPhone. And if you want to take it a step further, integrating document signing apps can enhance your efficiency even more.
Embrace the convenience and efficiency of digital signatures on your iPhone today!


